In this tutorial I'll try to explain the basic features of the map editor. If you don't understand something, please mail me. I'll try to add it or to make it more clear.
Index
- Creating a simple dual player map
- Making your map a capture the flag map
- Creating a race map
- Creating a single player map
- The parameters of a tank
- Setting mission goals
- Tips for making maps
Creating a simple dual player map

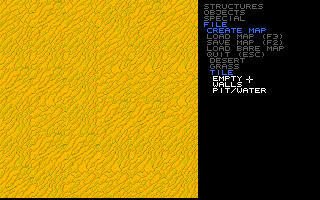
Start the map editor and press ESC ESC. After that select: file, create map, desert/grass/tile and finally what you want to start with. Selecting walls will place an inpenetratable wall around the map, so you can't wrap around on the borders. Selecting pit/water will fill the map with water (grass, desert) or make a big pit (tile). For this tutorial I selected walls.
After that you'll be prompted for the dimensions of the map. The numbers you enter must be dividable by four, if you enter a number that is not dividable by four then TANK will correct this for you.
Placing structures
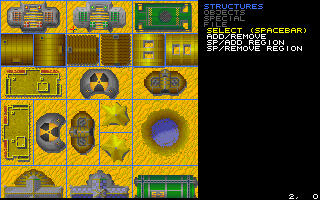
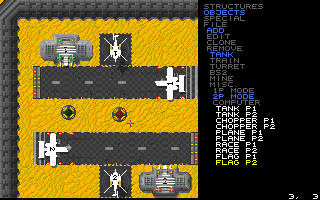
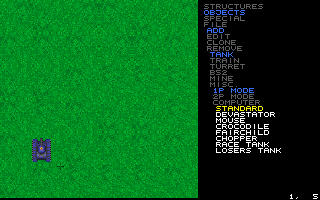
Next we want to place a base in this map. Press SPACEBAR to get the menu above. (Use the cursor keys to scroll through all structures.) Left click on the structure you want. The menu will disappear. Then point somewhere on the map and left click again. With the right mouse button, you'll remove existing structures.
Advice:
- Don't repeat the same building over and over again.
- Use things for which they were intended (More about that below).
- Don't put a structure over another structure. Placing a building over a road is OK, but a lot of other combinations will not work.
- Don't use halve structures. This can lead to very weird behavior.
Placing starting points for tanks
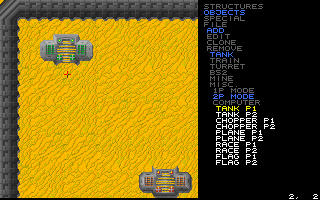
Select: objects, add, tank, 2p mode, tank p1 and left click somewhere on the map. You've now created a starting point for a normal tank for player 1.
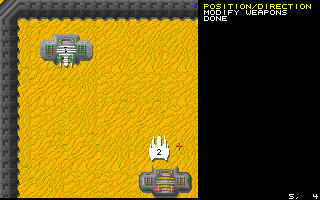
Here I've created the starting point for player one, and I'm busy creating it for player two. The menu on the right is the one you'll get when you're placing a starting point. Press the left button to give the tank a new location. Press the right button to rotate it. Press "done" or the middle button when you're done.
Above I've placed all starting points together with their standard structures. Your basic map is now complete.
Making your map a capture the flag map
You can make your map a capture the flag by placing flags in it. Select: objects, add, tank, 2p mode, flag p1. Then left click on the map. If you want to move it again, just left click somewhere else.
How to save your map
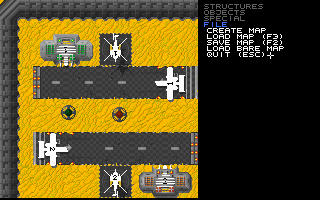
Select: file. If you want to save your map then select save map, if you want to save the map and then quit, select: quit. Next you'll be prompted for a filename, and if the file exists then you'll be prompted if you want to overwrite it.
Creating a race map
Create a tile map. The race track is not available in any other.
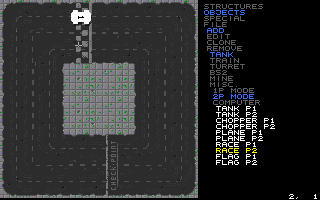
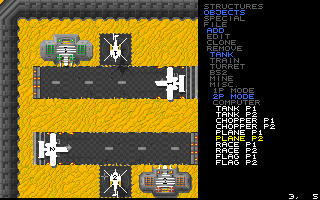
Above you can see an (almost) complete race map. Just put the starting point for player 2 in and then it is finished. The structure under the mouse pointer is the start, it must occur only once in the map. There must also be at least one checkpoint in the map. The maximum number of checkpoints is 25. If you die, you'll regenerate at the last checkpoint you passed. In the options menu (not map editor) you can select the number of laps.
Creating a single player map
Create a new map. I've created a grass map for a change.
Select: objects, add, tank, 1p mode and the tank you want to place. Left click on the map and a menu will appear in which you can change the parameters of the tank. Explanation of this below.
Advice:
- Don't use too many tanks in one level. The level will probably become too easy.
Creating a computer opponent
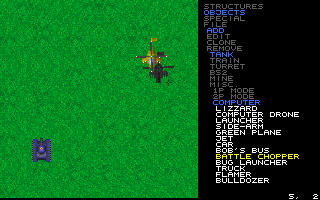
Above I've created a computer opponent.
Advice:
- Don't use too many tanks in one level, computer tanks cost a lot of computation time!
The parameters of a tank
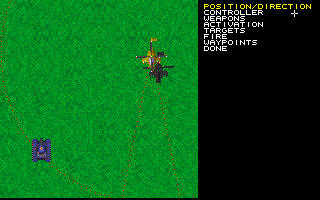
Here I'm editing the battle chopper. Just like the player starting points, you can move the tank if you select "position/direction" and click left somewhere on the map. Click right to rotate the tank.
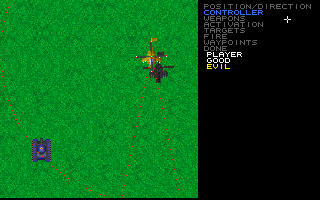
I want the chopper to attack the blue tank (which is controlled by the player), so I select it to be evil. If you select it to be good then it will be computer controlled, but it will attack all evil tanks. If you select "player" then another sub menu will appear in which you can select the ID this tank gets. ID = 1 means selectable by F1 etc. Change it by pressing the left or right mouse button.
Advice:
- Please don't make computer tanks player controlled and vice versa. It's confusing.
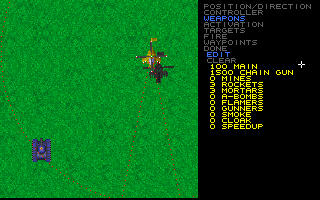
With the next menu item we can select the number of weapons this tank is carrying. Select "clear" to set all weapons to zero. Then use the left or right mouse button to select the number of weapons this chopper will carry.
Advice:
- Don't give your tanks too many weapons. A-bombs and mortars are very powerful.
- All computer tanks have their own standard weapon. Try to keep it this way as much as possible. (E.g. don't give the flamer a chain gun.) When a computer tank fires, it will not lose it's weapon. So if you give it only one A-bomb, it will fire A-bombs forever.
The rest of the menu items apply to to computer controlled tanks only.
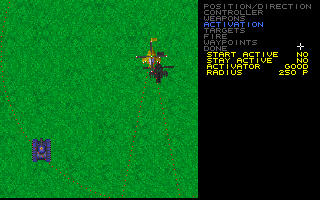
If you select "start active" yes, then the tank will start moving immediately, otherwise it will not move until a tank comes within a certain range. This is indicated by a white dotted circle, which you can't see in the above screen shot. This range can be adjusted with the "radius" menu item. With the "activator" menu item, you can select which tanks activate the tank.
If a tank is activated once then you can choose it to become inactive again if there is nobody in range, but you can also choose it to stay active with the "stay active" menu item. Planes always need to stay active, otherwise they'll crash.
With the above item you can select the priority the tank gives to following close enemy tanks or mission objectives. Most of the times you can just leave these values.
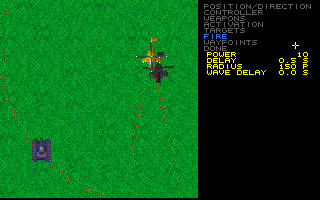
Each tank has it's own standard weapon. A battle chopper for example uses small rockets (main cannon). You can change the fire power of one rocket by changing the "power" menu item. The average armor of a tank is 30. With the "delay" item, you can change the fire rate of a tank. With the "radius" item, you can change the radius in which the tank will fire at another tank. This radius is indicated by the red dotted line.
The "wave delay" option is only useful for planes. If you make this value higher, the plane will "forget" it's target for a longer time, so it will make a bigger circle, and it will be able to hit it's target. You don't need to change this value.
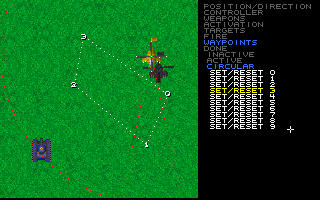
With the final option you can make a tank follow a certain route. Select the way point number and click left somewhere on the map. Click right to remove it again. You can make the way points circular, like in this example, but you can also select "active". The tank will then follow the path just once.
Advice:
- Don't place the way points too far away from the tanks starting point or too far away from each other. As way points become further away the tanks will consider them a less interesting goal and will give more priority to not colliding and maybe attack other tanks.
Setting mission goals
I will illustrate the principle of mission goals by a complete level.

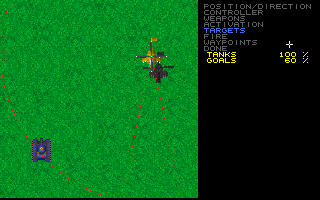
In this mission the blue tank (player) has to protect it's two tents and has to destroy the two tents of the enemy along with the green tank (enemy). We set the total points of the two tents in the upper left corner to -100, so if both are destroyed the mission is failed. The player tank doesn't get any points because the mission fails automatically if you don't have any tanks to play with.
The two tents both get 30 so if they're destroyed the mission is completed for 60%.
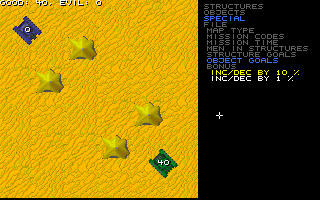
Next we set the tank to 40, so that if you also destroy the green tank the mission is completed.
It is OK to give more than 100 or -100 points in total. The mission is completed/failed when 100 or -100 is reached.
You can also give object points to other objects in the objects menu. The most important object is the goal object (which can be found in: object, misc., goal). This object destroys itself when a tank or train comes into it's radius.
Tips for making maps
The most important thing to remember when you're making a map is what the theme of the map will be.
If you're making a dual player map, remember that you want to play against another player and not against the computer. Here are some hints:
- Make the map as symmetric as possible. This way you'll ensure that the map is equally fair for both players.
- Do not put in too many turrets, and if you do, make them not too powerful.
- Don't use computer opponents or make them very weak.
- Don't make the map not too big. You'll be busy driving towards each other all of the time.
The above rules do not apply to capture the flag missions. In this case you can use computer opponents. But a big problem is to make the map fair. If a map isn't fair, it's no fun to play.
For player vs. computer maps please note the following:
- Don't use too many objects. Every tank, mine, turret, etc. is an object. Try not to use more than 150 objects. 100 would be nice for a map. Using too many objects slows down the game. You can see the number of objects you're using if you run tank with the -debug option.
- Tanks should be placed tactically, they take a huge amount of calculation time. Try using turrets instead.
- Don't place too many player tanks and don't give them too many weapons. This makes the game too easy.